
How to install n8n locally using Docker Desktop
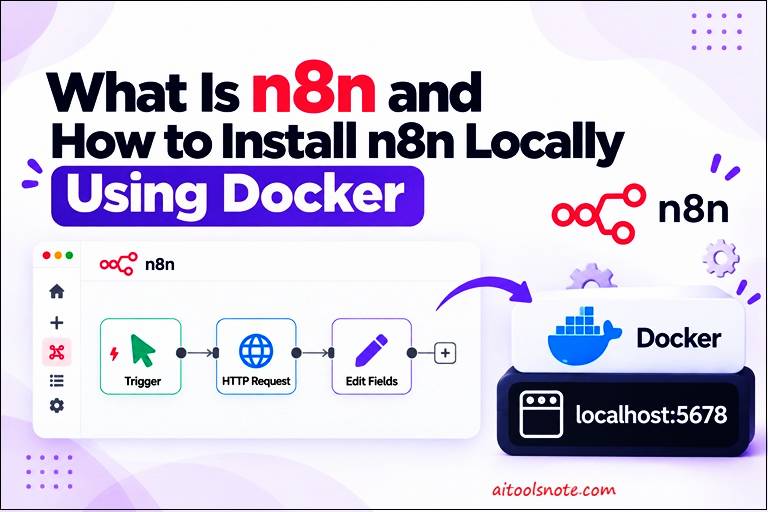 Do you copy data from emails into spreadsheets, or send the same Slack message every morning? If so, you are doing work that a computer can do for you. A tool called n8n can take over those repetitive jobs, and you do not need to be a programmer to use it.
In this guide, I will explain what n8n is in simple words. Then I will show you how to install it on your own computer using Docker Desktop, which lets you do almost everything by clicking buttons. We will finish by building a tiny workflow so you can see n8n working. Everything is written for complete beginners.
What Is n8n?
n8n (say “n-eight-n”) is a workflow automation tool. You use it to connect apps and services and make them do tasks automatically. It is an open-source, low-code/no-code orchestration platform that connects apps, APIs, and databases.
It is a numeronym for “nodemation”, a blend of node (referring to its node-based visual interface and Node.js runtime) and automation. ‘8′ represents the 8 letters (“o-d-e-m-a-t-i-o”) between the first n and the last n in nodemation.
Here is an example. Say you want a Telegram message every time someone fills out a form on your website. Doing that by hand means checking the form again and again. With n8n, you build a small automation once, and it runs by itself from then on.
n8n works like digital LEGO. You do not write long programs. You place small blocks on a screen and connect them with lines. Each block does one job, such as “read a spreadsheet,” “send an email,” or “ask an AI model a question.”
n8n is also “fair-code” software. In simple terms, the source code is open for you to see, and you can run it on your own computer for free. The cloud version is a paid service. This guide uses the free self-hosted version.
The Key Ideas You Should Know
You will see these words everywhere in n8n. Learning them now will save you a lot of confusion later.
- Workflow: one complete automation. It is the whole canvas of connected blocks.
- Node: a single block on the canvas. Each node does one small job.
- Trigger node: the first node. It decides when the workflow starts. For example, “every day at 9 AM,” “when a form is submitted,” or “when I click a button.”
- Action node: any node after the trigger. It does something with the data, such as sending an email or saving a row.
- Execution: one run of a workflow. n8n keeps a history of every execution, so you can check what happened.
- Credentials: your saved logins for other apps, such as a Google account or an API key.
- Webhook: a special trigger that waits for an outside app to send data to n8n. We will come back to it near the end.
Data moves from left to right. The trigger creates some data and passes it to the next node, which changes it and passes it on. That is all an automation really is.
Why Docker Desktop?
Docker runs programs inside small, separate boxes called containers. Each container has everything the program needs, so you do not have to install anything else yourself. Docker Desktop is the app that gives you a simple screen to manage those containers.
Here is why Docker is recommended for n8n:
- No extra software to set up. You do not need to install Node.js or fix version problems.
- Easy to manage. You start, stop, and delete n8n with buttons.
- Safe to remove and update. If your data sits in a volume (a safe storage space), you can update or recreate n8n without losing your workflows.
- A clean computer. Everything stays inside the container.
The trade-off is that Docker Desktop is a larger download and uses some memory. If your laptop is very old or low on memory, see the npm option near the end of this guide.
Prerequisite Before ‘How to Install n8n Locally using Docker’
Check these three things:
- A supported computer. Docker Desktop works on Windows 10/11, macOS, and Linux. On Windows, it uses WSL2 in the background, and the installer helps you turn that on.
- Virtualization is on. Most modern laptops have it enabled already. If Docker complains, you may need to turn it on in your BIOS settings.
- Enough memory. 8 GB of RAM makes things comfortable.
Docker Desktop is free for personal use. If you plan to use it at a larger company, check Docker’s current terms.
Step#1: Install Docker Desktop
- Go to the official Docker website and download Docker Desktop for your system.
- Run the installer. On Windows, keep the option to use WSL2 turned on.
- Restart your computer if the installer asks you to.
- Open Docker Desktop. You may need to accept the terms and skip the sign-in. A free account is not required to run containers.
- Wait until Docker Desktop shows that the engine is running. In the bottom-left corner, you should see a green indicator.
Step#2: Create a Volume for Your Data
This step is important, so please do not skip it.
A container forgets everything when you delete it. A volume is a safe storage space outside the container. If n8n stores its data in a volume, your workflows and settings survive updates and restarts.
- In Docker Desktop, click Volumes in the left menu.
- Click Create (or New volume).
- Type the name n8n_data and confirm.
Step#3: Download the n8n Image
An image is the ready-made package that Docker uses to create a container.
- Click the search bar at the top of Docker Desktop.
- Type n8nio/n8n.
- In the results, choose the n8nio/n8n image. It is the official one, so check that it is the one from n8n.
- Click Pull and wait for the download to finish. The first time, this can take a few minutes.
You can find the downloaded image under Images in the left menu.
Step#4: Run n8n From Docker Desktop
- Go to Images and find n8nio/n8n.
- Click the Run button (a small play icon).
- Click Optional settings to open more fields.
- Fill in the following:
| Field | What to enter |
|---|---|
| Container name | n8n |
| Host port | 5678 |
| Volumes: host path | n8n_data |
| Volumes: container path | /home/node/.n8n |
- If you use scheduled workflows, add an environment variable. Set the name to GENERIC_TIMEZONE and the value to your own time zone. This makes schedules run at the right local time.
- Click Run.
Docker Desktop will take you to the container page, where you can watch the logs. The screen layout may look a little different in newer versions of Docker Desktop, but the fields are the same.
The Same Thing With One Command
If you prefer typing, open PowerShell or a terminal and run this single command. It does exactly what the steps above do:
docker run -d --name n8n -p 5678:5678 -v n8n_data:/home/node/.n8n --restart unless-stopped docker.n8n.io/n8nio/n8n
What each part means:
- -d runs the container in the background.
- –name n8n gives it an easy name.
- -p 5678:5678 lets your browser reach n8n on port 5678.
- -v n8n_data:/home/node/.n8n connects your safe storage volume to n8n’s data folder.
- -restart unless-stopped starts n8n again automatically when Docker starts.
Step#5: Open n8n in Your Browser
Open your browser and go to:
http://localhost:5678
You can also click the 5678:5678 link shown in Docker Desktop’s Containers page.
The first time, n8n asks you to create an owner account. Enter your name, an email address, and a password. This account only exists on your own machine, so pick a password you will remember.
After that, you will see the n8n home screen. These are the parts you will use most:
- Overview: the list of all your workflows.
- The canvas: the big blank area where you place and connect nodes.
- Executions: the history of every run, including any errors.
- Credentials: where your saved logins for other apps live.
Managing n8n in Docker Desktop
Open the Containers page in Docker Desktop. You will see your n8n container there.
- Stop or start: use the square (stop) and play (start) buttons.
- See logs: click the container name and open the Logs tab. It shows what n8n is printing, which helps when something goes wrong.
- Delete: use the trash icon. Your workflows stay safe in the n8n_data volume.
If you like the terminal, the same actions are:
docker stop n8n
docker start n8n
docker logs n8n
Docker Desktop must be open and running for n8n to work. If you close Docker Desktop completely, n8n stops too.
Build Your First Workflow in 5 Minutes
Reading is good, but building is better. Let’s make a small workflow that fetches a random fact from the internet and keeps only the useful part. It needs no account or password.
1. Create a new workflow. On the home screen, click the button to create a workflow.
2. Add the trigger. Click Add first step and choose Trigger manually. This node starts the workflow when you click a button, which is perfect for testing.
3. Add an HTTP Request node. Click the small + after the trigger, search for HTTP Request, and add it. Set the method to GET and the URL to:
https://catfact.ninja/fact
This is a free public service that returns a random cat fact. Any free API works for practice.
4. Run the node. Click Execute step. n8n calls the website and shows the answer on the right side. You will see a fact field with a sentence in it.
5. Clean up the data. Click + after the HTTP Request node and add an Edit Fields node. Add one field named myFact and drag the fact field from the left panel into its value box.
6. Save and run. Click Save, then click Execute workflow. Each node shows a green check when it works. Open the Executions tab to see the record of your run.
Congratulations! You just built and ran your first automation. Real workflows follow the same pattern. They simply have more nodes, and the nodes connect to real apps like Gmail, Google Sheets, or Telegram.
How to Update n8n in Docker Desktop
n8n releases new versions often. When you want to update:
- Search for n8nio/n8n again and click Pull to download the latest image.
- Go to Containers, stop the n8n container, and delete it.
- Go to Images, click Run on the new image, and fill in the same settings as before. Use the same volume, n8n_data, so your data comes back.
Or use the terminal:
docker pull docker.n8n.io/n8nio/n8n
docker stop n8n
docker rm n8n
docker run -d --name n8n -p 5678:5678 -v n8n_data:/home/node/.n8n --restart unless-stopped docker.n8n.io/n8nio/n8n
Backup tip: you can export any workflow from the n8n editor as a JSON file. Download your important ones now and then, and keep them somewhere safe.
The One Limit of a Local Setup
Your n8n now lives at localhost:5678. That address only works on your own computer. This is fine for workflows that start by themselves, such as a daily schedule or a manual click.
But it creates a problem for webhooks. A webhook waits for another service, such as Telegram, GitHub, or Stripe, to send data to n8n. Those services cannot reach localhost, because that word means “this computer” for every machine. To fix this, you need a tunnel, such as ngrok, that gives n8n a public web address. I have written a separate step-by-step guide on setting up n8n webhooks locally on Windows with ngrok. Read it once you are comfortable with the basics here.
Common Problems and Fixes
Docker Desktop will not start. Check that virtualization is turned on and that WSL2 is installed on Windows. Restart your computer and try again.
The page at localhost:5678 does not load. Open Docker Desktop and check that the n8n container is running. Look at its Logs tab for error messages.
“Port is already allocated.” Another program is using port 5678. Delete the container and run it again with a different host port, such as 5679. Then open http://localhost:5679.
My workflows disappeared after I recreated the container. You probably ran the container without a volume. Always map n8n_data to /home/node/.n8n so your data stays safe.
The container name is already in use. An older container named n8n still exists. Delete it in Docker Desktop, or run docker rm -f n8n.
My scheduled workflow runs at the wrong time. Set the GENERIC_TIMEZONE variable to your own time zone, as shown in Step 4.
Alternative: Install n8n With npm (No Docker)
If you cannot use Docker, you can run n8n with Node.js instead. n8n’s documentation asks for a supported Node.js version, which at the time of writing is between 20.19 and 24.x. Check yours with:
node -v
Then install and start n8n:
npm install n8n -g
n8n start
Open http://localhost:5678 and continue from Step 5 above. To try n8n without installing it, you can also run npx n8n. Keep the terminal window open while n8n runs, and press Ctrl + C to stop it. To update later, run npm update -g n8n.
Quick Command Reference
# Create a volume for your data
docker volume create n8n_data

# Run n8n
docker run -d --name n8n -p 5678:5678 -v n8n_data:/home/node/.n8n --restart unless-stopped docker.n8n.io/n8nio/n8n

# Stop, start, and view logs
docker stop n8n
docker start n8n
docker logs n8n

# Update n8n
docker pull docker.n8n.io/n8nio/n8n
docker stop n8n
docker rm n8n
# then run the same "docker run" command again

# Open n8n in your browser
# http://localhost:5678
What to Learn Next
Now that n8n is running, here is a good path to follow:
- Build a workflow with a Schedule Trigger that runs every morning.
- Add Credentials for a real app, such as Google Sheets or Gmail.
- Learn how data moves between nodes by studying each node’s input and output panels.
- Try an AI node and connect it to a model of your choice.
- Learn webhooks, so outside apps can start your workflows.
FAQs
Q1: What is n8n used for?
n8n connects apps and services so tasks run automatically. For example, it can send a Telegram message when a form is submitted, or copy email data into a spreadsheet.
Q2: Is n8n free?
You can run the self-hosted version on your own computer for free. The cloud version is a paid service, and some features may need a paid plan.
Q3: Do I need Docker to run n8n locally?
No. You can also install n8n with Node.js and npm. Docker Desktop is a good choice for beginners because it avoids version problems and lets you manage n8n with buttons.
Q4: Why do I need a volume when running n8n in Docker?
A container forgets its data when you delete it. A volume stores your workflows and settings outside the container, so they survive updates and restarts.
Q5: What address do I open after installing n8n?
Open http://localhost:5678 in your browser. The first time, n8n asks you to create an owner account.
Q6: Will my n8n workflows run when my computer is off?
No. With a local setup, n8n only runs while your computer is on and Docker Desktop is running. For always-on workflows, use a cloud plan or a server.
Conclusion
n8n is one of the friendliest ways to start with automation, and Docker Desktop makes the setup easy. Install Docker Desktop, create one volume, pull one image, and click Run. The hardest part is usually that first step. Now that you have done it, the rest is practice.
Start small. Pick one boring task you do every week and try to automate it. Once you see your first workflow run on its own, you will start noticing automation opportunities everywhere.
Happy automating!
How to Use n8n Webhooks Locally on Windows 11/10 (Docker & ngrok)